
An astrolabe is an ancient device that made use of facts about the position of celestial bodies (the sun during the day and stars at night) to calculate other information. The classical kind of astrolabe is called a planispheric astrolabe, an instrument often made of brass and operated by manipulating movable parts around fixed plates. By aligning inscribed scales and other markers, users could perform functions such as telling the time (even during the night), determining the length of the day, or calculating when the moon would rise or set. A planispheric astrolabe could also be used to determine latitude, but a simpler device that focused exclusively on helping determine a ship's latitude at sea was called a mariner's astrolabe. It relied on measuring the height of the sun at noon or of specific stars at night. Measurements of a star's height above the horizon along with information in an almanac could then be used to calculate latitude.
Because the North Star (Polaris) remains in a fixed position in the sky of Earth's northern hemisphere, observers who can see it can determine their latitude simply by measuring how high it appears above their horizon. The following instructions will help you make a simple, homemade astrolabe that can accomplish this task:

Image 1: The pieces
You Will Need

Image 2: The weight hangs freely.
- 1 clear plastic protractor, with a six-inch ruler and a center hole
- 1 piece of thin string, approximately twelve inches in length (make sure the string is thin enough to easily fit through the center hole in your protractor)
- 1 or 2 washers (or other objects that can be tied onto the string to hold it taut; about ½ ounce)
- 1 straw approximately nine inches long (the larger its diameter the easier it will be to use; the smaller the diameter the more accurate your results will be)
- tape
- optional, to facilitate use: a red flashlight, a piece of white paper, and a partner
Steps

Image 3: Center the protractor beneath the straw.
1. Assemble the components (Image 1).
2. Loop the string through the center hole in the protractor and through the hole in the washer(s). Tie the string securely leaving it long enough so that when you hold the protractor with the ruler side up, the weight hangs suspended below the curved arc and the string intersects the numbers that indicate the angle being measured (Image 2).
3. Use tape to affix the straw along the straight edge so that the protractor hangs below the center of the straw's tube (Image 3). Do not tape the protractor to the side of the straw, and be careful to apply the tape where it will not impede the motion of the string.
To Use
First a caution: This device is intended to be used at night. Never look directly at the sun. Doing so can damage your eyes.
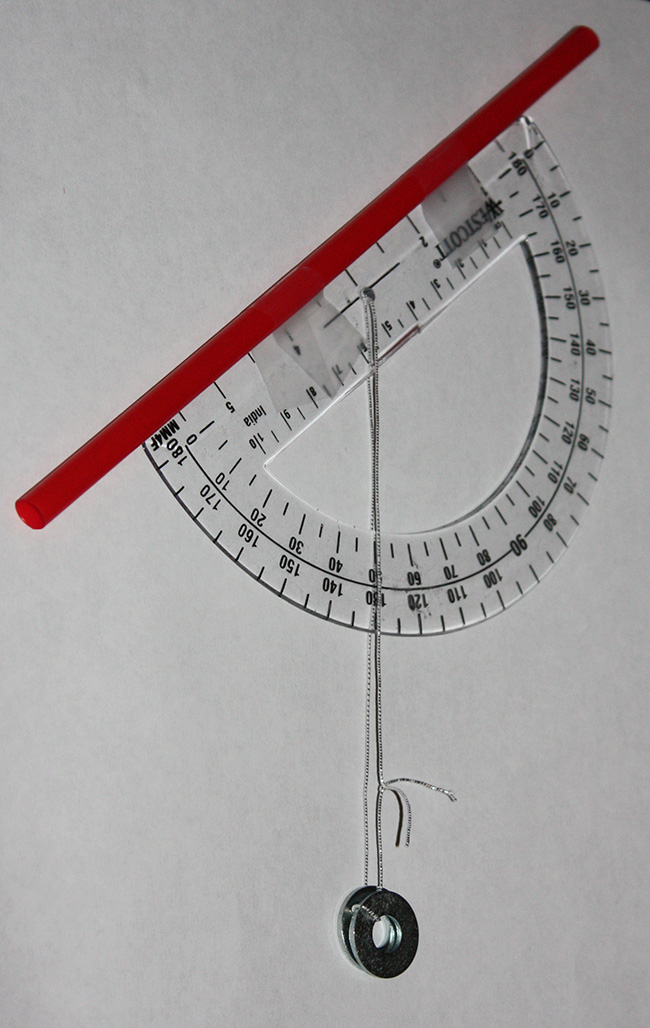
Image 4: The measured obtuse angle minus 90 degrees equals your latitude.
- On a clear night, find the North Star (Polaris) (instructions can be found here). Hold your astrolabe with one hand and place your fingers so that they do not interfere with the string's ability to let the weight hang straight down as you change the device's angle up or down.
- With one eye, look through the straw and move your instrument until you can see the North Star (Polaris) in the center of the straw. Tip: Seeing through the narrow straw in the dark can take practice. Shut one eye, and hold your astrolabe so that the star is aligned with the pupil of your open eye. Shining a red-colored light on the side of the straw (or having a partner do this) can help you see the straw without impeding your ability to see the star.
- When the North Star (Polaris) can be seen in the center of the straw, observe the angle where the string intersects the protractor's arc. If you're working alone, carefully hold the string in place against the protractor as you lower it for your own observation. If you're working with a partner, your partner can make this observation while you keep the star sighted in the straw. Holding your (or your partner's) palm or a white piece of paper behind the numbers can make them easier to see in the low light of night.
- The protractor will show two sets of numbers, one set along the inner side of the arc and the other along the outer side. One set will contain numbers less than 90, and the other will contain numbers larger than 90. The relative positions of the larger and smaller numbers will depend on which direction you look through the straw. The numbers larger than 90 indicate the number of degrees in the angle formed between the line you sighted (thorough the straw) and the weight at the end of the string (which gravity pulls to point straight down). Because there are 90 degrees between straight down and straight out to the horizon, you will need to subtract 90 from the angle you measured to determine the angle of the star above the horizon. For example, if you measure an angle of 130°, this means the star is 130° above straight down. Subtracting 90° (the number of degrees between straight down and the horizon) will give you an answer of 40°. This is how high the North Star (Polaris) is above your horizon, and it is equal to how far you are above the equator. This is your latitude (Image 4).
Depending on how your protractor is marked (every degree or every five degrees), how accurately the protractor hangs under the center of your straw, and how precisely you are able to center the star inside the straw, you will probably be able to determine your latitude within five degrees. With practice and a steady hand, you may be able to improve your precision to one or two degrees.
Measuring devices used at sea employ more complex features to help improve accuracy. A sextant, for example, is a device that works by the same principles, but it also aids in establishing the position of the horizon from a moving ship's deck.
For ancient mariners at sea, latitude (which indicated north/south position) was only part of the story. They also needed to be able to determine longitude (an east/west measure). That turned out to be more complex, and a solution wasn't found until the eighteenth century when accurate timepieces were developed. "John Harrison and the Longitude Problem," by the National Maritime Museum (UK) discusses this accomplishment.
Here are some additional resources for more information about astrolabes and celestial navigation:
"The Astrolabe: An instrument with a past and a future," by James E. Morrison (published by Janus), offers information about the history and development of the astrolabe and related instruments.
"Build a Simple Sextant," a teacher's resource provided by NASA, offers an alternate way to make a similar homemade instrument.
"Make Your Own Astrolabe," by the National Oceanic and Atmospheric Administration (NOAA) offers instructions for making a more complex astrolabe that can be used to determine the height of a terrestrial object.
Celestial Navigation Net discusses the ancient arts of wayfinding and navigational astronomy.